Making a "Stain Glass" window

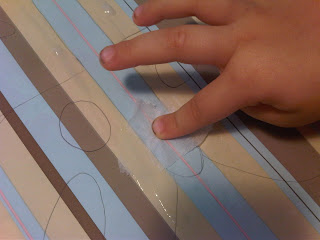
Use pencil to draw that way if any of the lines transfer you can erase them from the finished project.
Sorry it is hard to see the lines but my mack-tack had a fairly bold print.
Next make the glue, you could use watered down pvc glue but I jsut make my own:
Mix 1 Cup water 1 tablespoon flour and 1 teaspoon salt and bring to a boil keep at a simmer until thickend, cool and you are ready to go.
Also rip up small pieces of tissue paper in the co lours you would like to use for your picture.
Now we start the picture. place a thin layer of glue on your drawing ( you can see the butterfly better here)
( my daughter insisted on starting with white so you can not see it very well in this photo)
 This is a messy process but it is hard to make mistakes, the tissue can be pushed a round and bunched up to fit in the lines and going out of he lines is totally allowed as well.
 Once all was done i place a sheet of white tissue paper over the entire picture to cover any holes that may have been left.
 After covering the entire picture with a thin layer of glue the white becomes transparent and gives the piece a little more durability I really suggest it.
 Finally you need to lay the piece out to dry in a well ventilated area for a day or two then peel it off the backing , trim the edges and it is ready to display.
 Here is the butterfly in my daughters bedroom on a sunny day ( the shaded part is from my overhang we dont get much sun in our house.)
 This is a messy process but it is hard to make mistakes, the tissue can be pushed a round and bunched up to fit in the lines and going out of he lines is totally allowed as well.
 Once all was done i place a sheet of white tissue paper over the entire picture to cover any holes that may have been left.
 After covering the entire picture with a thin layer of glue the white becomes transparent and gives the piece a little more durability I really suggest it.
 Finally you need to lay the piece out to dry in a well ventilated area for a day or two then peel it off the backing , trim the edges and it is ready to display.
 Here is the butterfly in my daughters bedroom on a sunny day ( the shaded part is from my overhang we dont get much sun in our house.)
I am hoping to make more of these for our patio doors for different seasons/ holidays Halloween pumpkins, Christmas trees, easter eggs the possibilities are endless.
I must give credit to the children's TV show Mr Maker although I did add a few steps and personalized it to fit our needs.


Comments
Post a Comment