
No Melt Popsicle Tutorial...and Healthy Too!


No Melt Popsicle

Cantaloupe and blueberry flavour


I have 2 Young girls at home and many nieces and neighbours that like to visit my place and when the weather begins to get hot as Popsicles are always in high demand.  I avoid artificial flavours, colours and added sugar when ever possible so I tried to make my own when ever possible, I also find that little ones often put them down and forget about them, at times in places you don’t see (like last week my 4 year old left hers on the end table in the basement for a least half an hour before I noticed, and since it was one of these she was able to pick it up and finish it!) and you don’t want a big sticky puddle, So I came up with these popsicles they are easily made with fruit and juice from your fridge, perhaps that nearly over ripe fruit that you need to use up (that is what this batch was made from) try it out and see how many flavours you can come up with!


Ingredients and tools needed:

Food processor (or blender even a potato masher would work)
Measuring cups (4 Cupper and 1 or 2 cupper)
Measuring spoons
Small bowl
Mixing spoon
Sauce pan
Popsicle moulds or paper cups and sticks

Cantaloupe or other Soft Fruit to blend (watermelon, peaches, canned pears all work well too.)
Blueberries or other fruit to stir in
Apple Juice or other non citrus juice or water
Unflavoured Gelatine powder or flavoured if you want 


Step 1
Cut up your Cantaloupe and blend until smooth 
 measure the amount you have, in my case it is about 2 cups.


Cantaloup ready to pure.
2 Cups of Puréed Cantaloup

Step 2

Pour  apple juice (or other liquid of your choice) into a separate measuring cup. 
Measure  enough juice to make a full number of cups of liquid in my 
case that will be 1cup  to make 3 cups total.


1 Cup of apple Juice.
Step 3

Measure and "bloom" your gelatine.  

You will need one pouch of unflavoured gelatine per 2 Cups of liquid,(or just a little more is fine too)  that is equal to 1 Table spoon of gelatine per 2 Cups of liquid if you buy your gelatine from a bulk store.

I used 4 table spoons (2 packets) of gelatine(follow directions on your package) for 3 cups of thick “juice”.

Blooming means put a small amount of your apple juice into your gelatine and let set for 15 min to begin dissolving and avoid lumps.

Bloomed gelatine and remaining apple juice
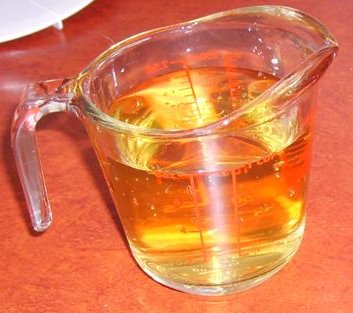
Step 4

Place gelatine and the rest of your apple juice in a sauce pan and
put on low heat to fully dissolve the gelatine. Then remove form
heat and let cool for 5 min or so.

This does not need to come to a boil just ensure the gelatine is fully dissolved.

Fully dissolved gelatine
Step 5

Mix apple sauce gelatine into cantaloupe mixture 
and mix in blueberries (or other additive of you choice )I  used a full pint.


Step 6

Spoon mixture into the popsicle mould. (Yes I have a crazy amount of
molds as I only want to do this every few weeks, I normally make a bigger batch)
Moulds ready to be filled.
All filled up and ready to freeze

Step 7

Freeze your popcicles.

Sitting in my messy freezer

Step 8

Unmould and enjoy.


My Popsicle Monsters enjoying a Watermelon Blueberry popsicles earlier this week.

Comments

Popular posts from this blog

Reusable Cotton Mak-Uup Pads...Tutorial

Make Your Own Cotton Make-Up Removal Pads A Tutorial I have been a a de stashing kick lately and one of the things I have a lot of bits of is cotton yarn.  I recently renovated my Master bathroom and as a result I have been trying to de clutter and one thing I figured I could get ride of is the cotton pads and balls from under the sink (by using them) and replace them with a single set of reusable cotton pads that will a small jar on my counter and in doing so also save me some money by  keeping me form buying more single use cotton pads in the future.  As I was making my little circles I took some photos to share the process with you. Step 1 Create a magic circle and cast on 6 Step 2 Close the Magic Circle Step 3 Chain one, 2 Single Crochet in each Single crochet and slip stich to close Step 4 Chain 2, 2 Double Crochet in each single crochet and slip stitch.     Step 5 With Darning needle sew in the loose ends Step 6 Clip remaining ends Repeat as needed.

Hello Again and the Organizing Challenge

Hello Again Everyone It has been a long time since I have taken the time to share my Craftyness with you.  This is not because I have not been crafty but more because I have gotten busy and probably a little lazy also my place is kinda messy and often I feel some tidying needs to be done before I can take pictures to show and then well .... It just kinda falls by the way side. I have decided I am going to try to ease back into doing more crafting and more blogging, and the way I have decided to do this is by taking part in an organizing challenge on one of my favorite Thrifty blogs,  Mrs January.com . and I will try my best to share my results with you here on my blog. I have decided to share this here as one of the biggest obstacle I have when wanting to be crafty is not having an organized and tidy home, to be crafty in, so my hope is that by the end of June I will have a more pleasant place to be crafty and continue to share my craftiness with you. So who is with me? check o

30 Day Organizing Challenge Day 1 Results

30 Day Organizing Challenge  Day 1 Organize Your Purse, Diaper Bag or Wallet Results As part of getting back into blogging I am taking part in MrsJanuary.com An Organized Home in 30 Days Challenge and blogging about it here. Well it was late last night but I finally went to my front hall and found this mess of purses and bags that I use on a regular bases. I took all these bags and looked inside, none of these bags had every thing I would need if I needed to run out of the house right now, they were also so messy it would have been difficult to find what i needed easily. A small clutch, a bag I took shopping, a bag with stuff for my kids and a bag with my wallet and some crochet...none are useful on their own at the moment So to Start I dumped every thing out on the Coffee Table. Next I put things I did  not need in my every day bag away. I put a spare bathing suit and towel in one bag to leave in the back of my front hall closet for last min